My DIY Heli Pad
3946 36 2015-8-20
Uploading and Loding Picture ...(0/1)
o(^-^)o
jayhkr
lvl.4

United States
Offline

[size=14.6666669845581px]So I go out to a local park and they seem to like to keep their grass super tall, not ideal for launching or landing our P3's.  I saw a heli-pad someone was selling for like $50+ and thought, hmmmm, I can make one of those.  So here is my little tutorial on how I made my own Heli-Pad

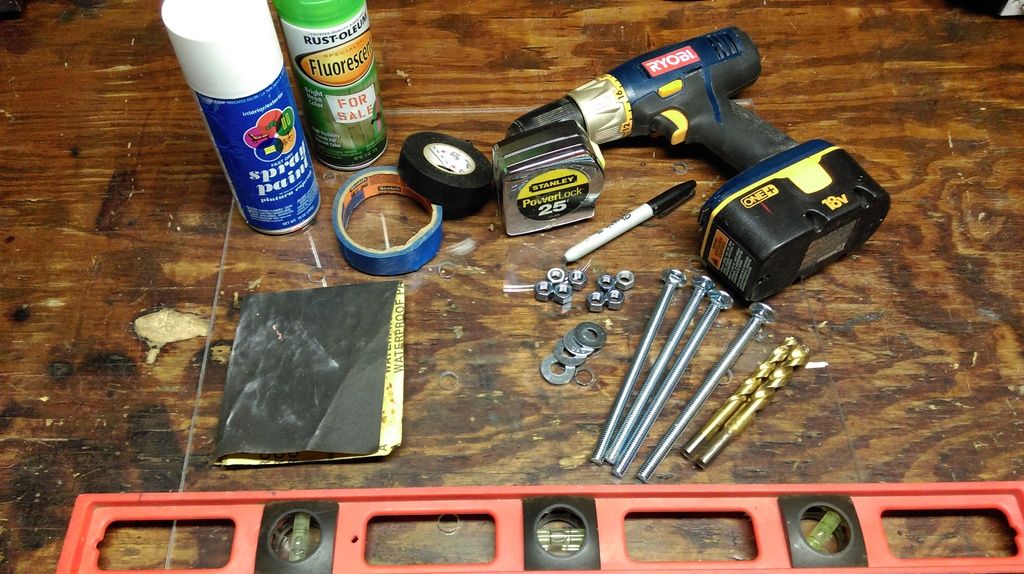
[size=14.6666669845581px]So here's what you'll need:
[size=14.6666669845581px].22x18x24" Plexi (Acrylic) Glass or 1/4x24x24 sheet of plywood (3 ply)
[size=14.6666669845581px]4 - 3/8"x6.5" Carriage Bolts
[size=14.6666669845581px]8 - 3/8" Washers
[size=14.6666669845581px]8 - 3/8" Nuts
[size=14.6666669845581px]3/8" Drill Bit
[size=14.6666669845581px]1/2" Drill Bit
[size=14.6666669845581px]Drill
[size=14.6666669845581px]320 Grit Wet/Dry Sandpaper
[size=14.6666669845581px]Sharpie or Marker
[size=14.6666669845581px]Ruler
[size=14.6666669845581px]Painters Tape/Electrical Tape
[size=14.6666669845581px]$.99 cent Flat White Spray Paint
[size=14.6666669845581px]Flourecent Green Spray Paint
[size=14.6666669845581px][color=rgb(120, 120, 120) !important]
[size=14.6666669845581px]Step 1)
[size=14.6666669845581px]Cut the plexi glass (or plywood) to 18"x18" square

[size=14.6666669845581px]Step 2)
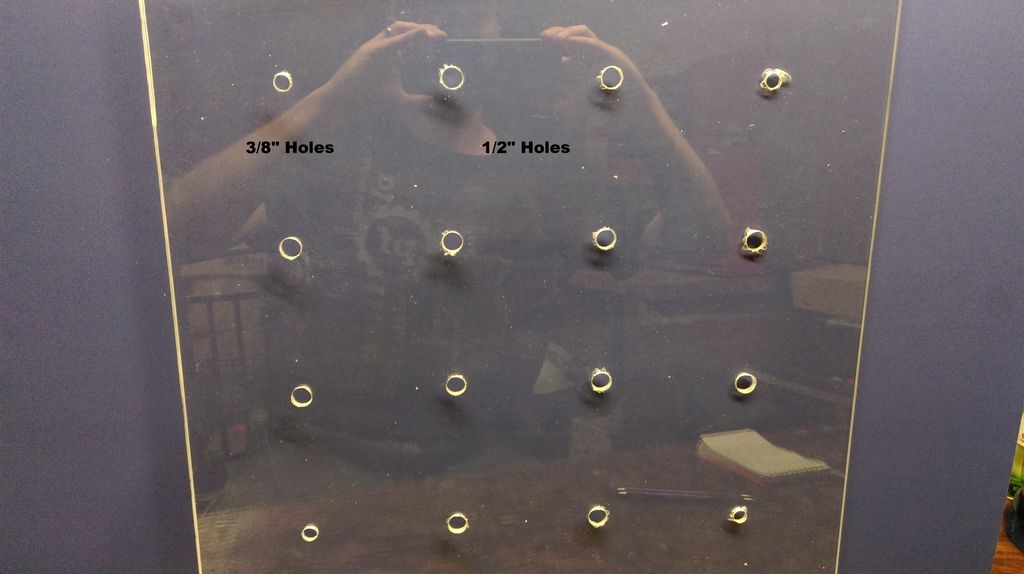
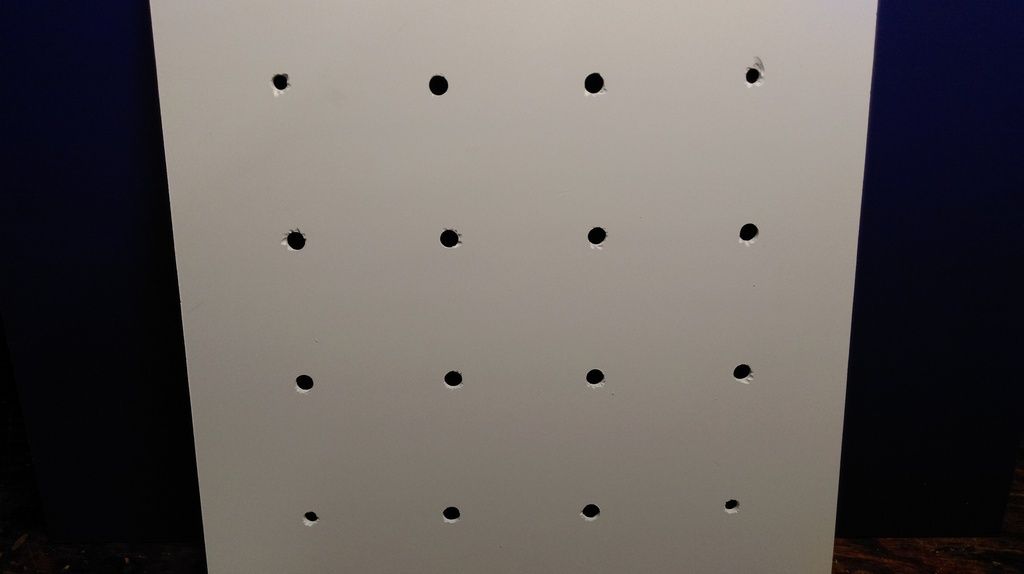
[size=14.6666669845581px]Drill 3/8" holes 3" from the sides at each corner
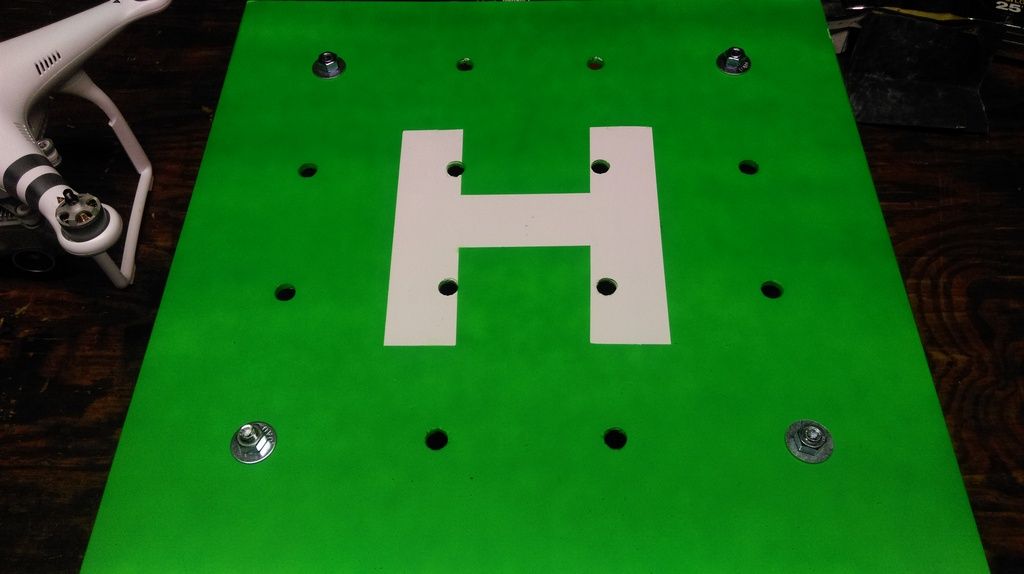
[size=14.6666669845581px]Drill 1/2" holes 4" apart starting at the 3/8" holes at the corners
[size=14.6666669845581px](Drill very slowly and back the bit out if it becomes stuck.  I suggest drilling halfway through on one side, and halfway on the other to reduce chipping)
[size=14.6666669845581px][color=rgb(120, 120, 120) !important]
[size=14.6666669845581px]Step 3)
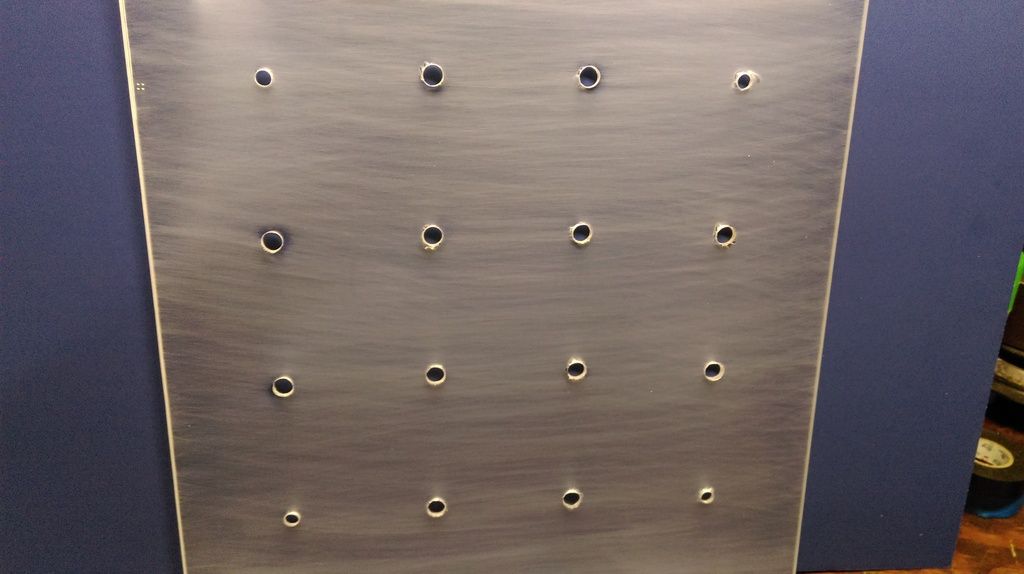
[size=14.6666669845581px]Lightly sand surface on both sides till sheen is completely gone.  This will help the paint adhere better.
[size=14.6666669845581px][color=rgb(120, 120, 120) !important]
[size=14.6666669845581px]Step 4)
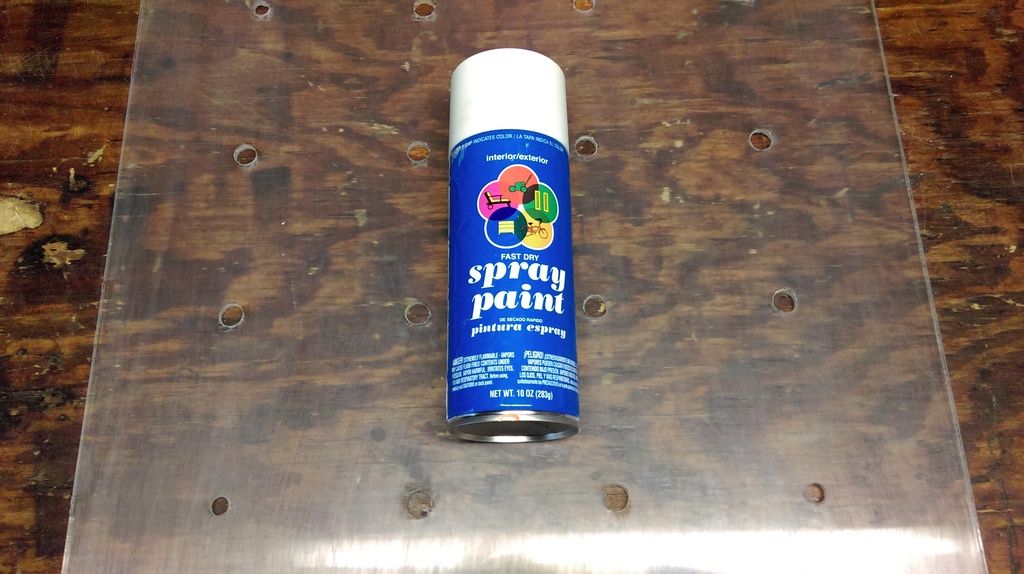
[size=14.6666669845581px]Wipe down each side so there is no dust, loose acrylic, or anything else on the plexi then get the flat white paint and spray 3-5 light coats on each side.  Be sure to allow the paint to dry for just a few minutes in between each coat.  This will help reduce splotches and runs in your paint.
[size=14.6666669845581px][color=rgb(120, 120, 120) !important]
[size=14.6666669845581px][color=rgb(120, 120, 120) !important]
[size=14.6666669845581px]Step 5)
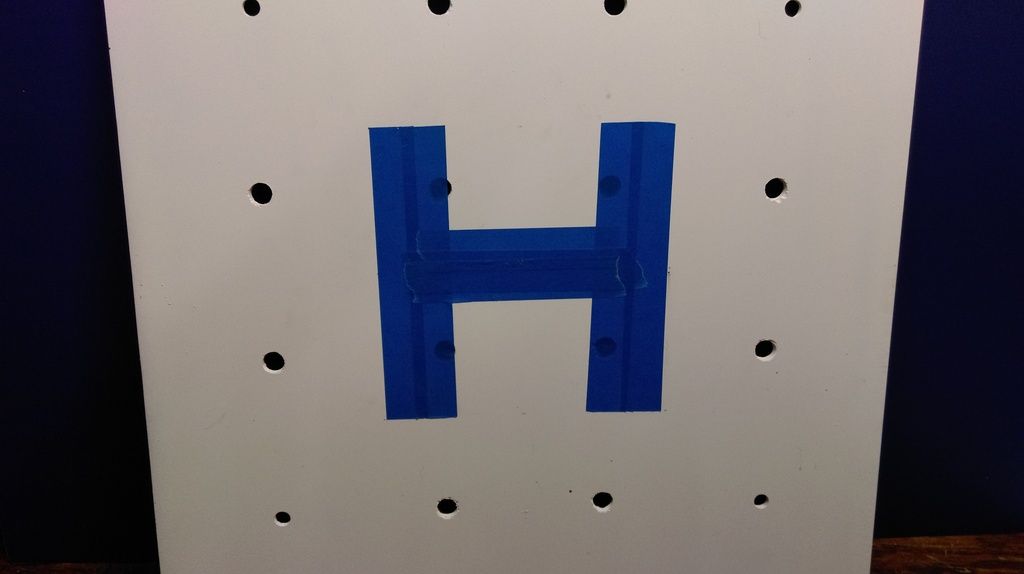
[size=14.6666669845581px]After the paint has FULLY dried (at least 1-2 hours depending on humidity) get your painters tape and make an "H" directly in the center of the board.  My "H" was 7"x7" so I marked 3.5" from center and cut my tape appropriately.  Take your time and be sure everything is centered the best you can (Mines just a little off) Press the tape firmly around the edges to ensure no paint gets underneath it.
[size=14.6666669845581px][color=rgb(120, 120, 120) !important]
[size=14.6666669845581px]Step 6)
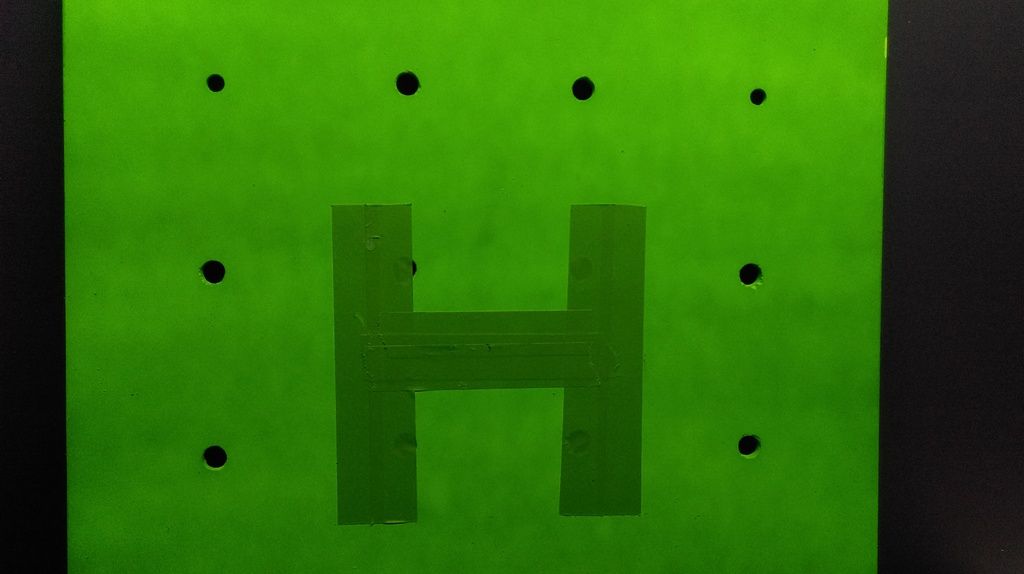
[size=14.6666669845581px]Grab the fluorescent paint (I chose green, but you can do which ever color you like!) and just like with the white, do multiple light coats allowing the paint to dry slightly in between each coat.  I chose to paint both sides but you can do just the top if you wish.
[size=14.6666669845581px][color=rgb(120, 120, 120) !important]
[size=14.6666669845581px]Step 7)
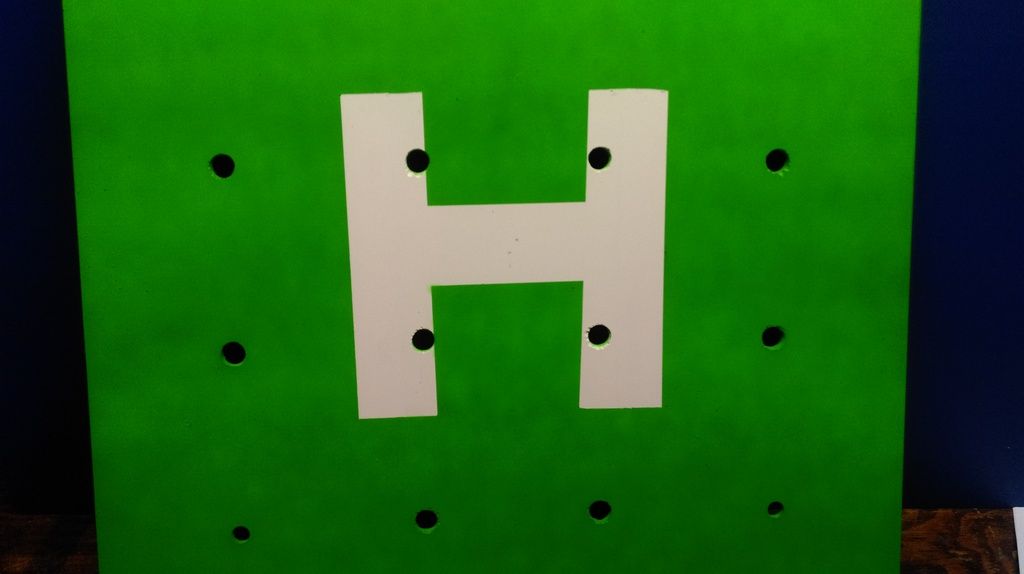
[size=14.6666669845581px]Again, after several hours (2-3 minimum) to be sure the paint has fully dried, carefully remove the tape peeling it back slowly.  If you've allowed the paint to fully dry and you pressed firmly when you first applied the tape, it should leave a clean, crisp line.
[size=14.6666669845581px][color=rgb(120, 120, 120) !important]
[size=14.6666669845581px]Step 8)
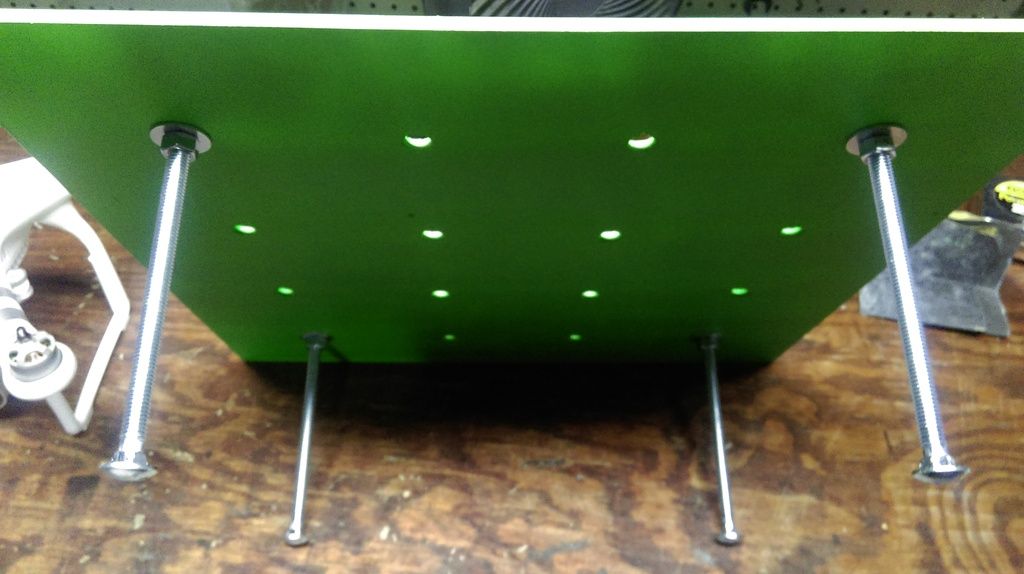
[size=14.6666669845581px]Take the 3/8" carriage bolts and thread a nut on a few inches down, then place a washer on top of it.  Put it in one of the corner 3/8" holes you drilled earlier, then place a washer and another nut on top of that.  I made mine flush with the top of the carriage bolt.
[size=14.6666669845581px][color=rgb(120, 120, 120) !important]
[size=14.6666669845581px][color=rgb(120, 120, 120) !important]
[size=14.6666669845581px]Step 9)
[size=14.6666669845581px]That's it, take it out and test it.  With using the longer carriage bolts it allows me to screw one side in if the ground is uneven, allowing my Heli-Pad to stay level.  I have a small "triangle level" that I can keep in my DJI backpack that will show me the level of the Heli-Pad.
[size=14.6666669845581px][color=rgb(120, 120, 120) !important]
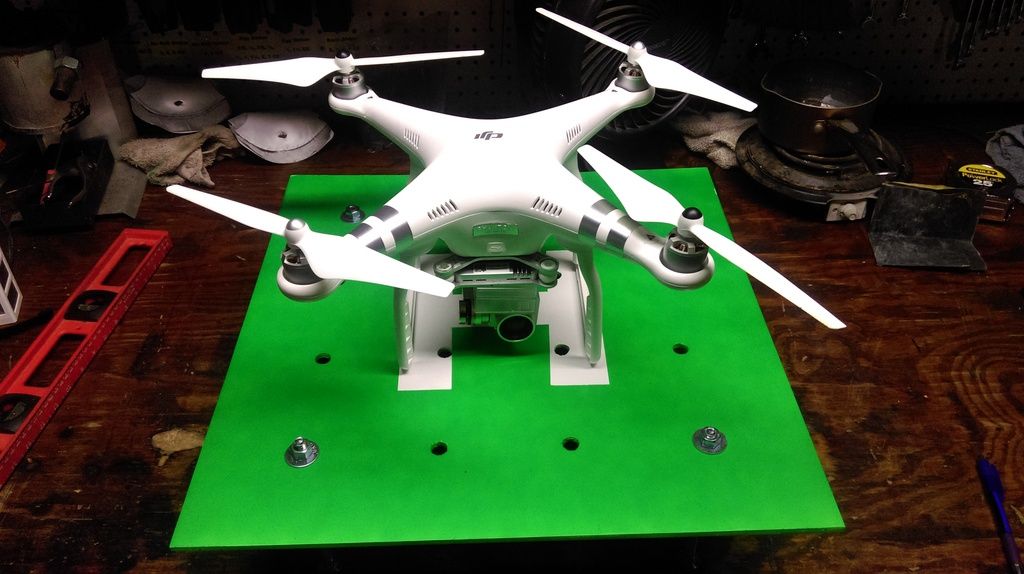
[size=14.6666669845581px]That's it, hope you guys enjoyed this DIY, most items some of you will probably already have in your garage or basement.  I was lucky and only had to purchase the green paint and carriage bolts.  But if you were to buy the plexi-glass it would run you about $18-20 at your local hardware store.  I chose plexi-glass over plywood for weight and I didn't want to sand the plywood to the smoothness I would want from it.  Plexi was much easier for me.

2015-8-20
Use props
rayrokni
Second Officer
Flight distance : 8139875 ft
United States
Offline

very nice, here starts all the fun moding stuff and creating things, see dji makes your mind work!!!
p.s. are those legs magnetised bolts? lol
2015-8-20
Use props
jayhkr
lvl.4

United States
Offline

rayrokni Posted at 2015-8-21 13:37
very nice, here starts all the fun moding stuff and creating things, see dji makes your mind work!!! ...

Thank you, it's sad as I should be asleep for work tomorrow but at nearly 1am I'm up thinking of what to work on with my next flight.

and those bolts were made from the metal from the core of the earth thus giving it a radioactive magnetism unparalleled to any other magnet! LOL.......or it's just a regular cheap $.50 bolt from the hardware store.
2015-8-20
Use props
rayrokni
Second Officer
Flight distance : 8139875 ft
United States
Offline

jayhkr Posted at 2015-8-21 13:44
Thank you, it's sad as I should be asleep for work tomorrow but at nearly 1am I'm up thinking of w ...

i am sadder, sitting in front of laptop at dark thirty yapping about nothing.

so the bolts should do your compass a world of good, compass is at back right landing gear under the flap with 2 small screws.

you ll be fine im just kiddin, bolts are small enuff
2015-8-20
Use props
Willie Wonka
lvl.4

United States
Offline

I would do a plastic version to avoid compass skew at take off, plus i would use that on top of my vehicle as landing pad with adjustable legs to fix any tilt of the surface you put it on
2015-8-20
Use props
HunterBrooks
lvl.4

United States
Offline

jayhkr Posted at 2015-8-21 13:44
Thank you, it's sad as I should be asleep for work tomorrow but at nearly 1am I'm up thinking of w ...

LOL ... I was just gonna type on another post to willie and rayrokni, "Guys, love ya to death, but I'm going to fricken bed."  Big presentation tomorrow morning.  Thank God I'm on the West coast now .... still only 11pm.

Later ...

Oh, nice heli pad btw.  I started using a big rubber pad as a landing pad.  I hike with my P3, so I need something easy and light to carry.  If I could launch from my back yard, I would also create something like yours.  Good job.
2015-8-20
Use props
rayrokni
Second Officer
Flight distance : 8139875 ft
United States
Offline

HunterBrooks Posted at 2015-8-21 13:55
LOL ... I was just gonna type on another post to willie and rayrokni, "Guys, love ya to death, but ...

west coast huh! thats where all the crazy DRONE flyers are getting our uav hobby in trouble, sleep well
2015-8-20
Use props
HunterBrooks
lvl.4

United States
Offline

rayrokni Posted at 2015-8-21 13:58
west coast huh! thats where all the crazy DRONE flyers are getting our uav hobby in trouble, sleep ...

I know ... it's like they're all accumulating in San Diego for some reason - like some kind of "idiot vortex" or something.
2015-8-20
Use props
rayrokni
Second Officer
Flight distance : 8139875 ft
United States
Offline

Willie Wonka Posted at 2015-8-21 13:51
I would do a plastic version to avoid compass skew at take off, plus i would use that on top of my v ...

your vehicle made of plastic willie? or u meant  for landing only so his compass doesnt point to Timbuktu at takeoff
2015-8-20
Use props
rayrokni
Second Officer
Flight distance : 8139875 ft
United States
Offline

HunterBrooks Posted at 2015-8-21 14:00
I know ... it's like they're all accumulating in San Diego for some reason - like some kind of "idi ...

well it is california after all, hey  is california part of usa btw?
2015-8-20
Use props
Willie Wonka
lvl.4

United States
Offline

rayrokni Posted at 2015-8-21 14:03
your vehicle made of plastic willie? or u meant  for landing only so his compass doesnt point to T ...

yeah i am going to buy my next car from toys R us LOL , no i meant the pad itself and its legs would be from plastic.
2015-8-20
Use props
rayrokni
Second Officer
Flight distance : 8139875 ft
United States
Offline

Willie Wonka Posted at 2015-8-21 14:05
yeah i am going to buy my next car from toys R us LOL , no i meant the pad itself and its legs wou ...

btw, just received my dji backpack, im glad i listened to you and bought that, lugging a suitcase would ve been a nightmare
2015-8-20
Use props
Willie Wonka
lvl.4

United States
Offline

rayrokni Posted at 2015-8-21 14:08
btw, just received my dji backpack, im glad i listened to you and bought that, lugging a suitcase  ...

Yeah because I did and it was not fun, but the backpack is more mobile and small and less of a theft magnet.
2015-8-20
Use props
Skater67
lvl.3
Flight distance : 417149 ft

Colombia
Offline

Ordered my Quadcopter Helipad from UABITS last week.  I like their design and since I would probably drill a hole thru my hand while trying to make one this is the safer option.  I'm practicing approaches to the ground (an approach where you land without coming to a hover) and slope landing and the Helipad looks like a great platform to practice on.  Don't try these procedures if your new to the game because they are not that easy.
2015-8-21
Use props
Austringer
lvl.1
South Africa
Offline

Hi,

a Heli Pad like this is a great idea. Also good practice for landing on precise areas.
2015-8-21
Use props
Zdrone
lvl.4
Flight distance : 1805141 ft
  • >>>
United States
Offline

Good for the beach also...... especially if you're in California.
2015-8-21
Use props
greenbean
lvl.3
Flight distance : 84783 ft
United States
Offline

work in progress...3/16 polyethylene sheet, acrylic piano hinge affixed with specific chemically bonding double face tape…looking for adjustable plastic legs…fits in backpack...
IMG_0055.JPG
IMG_0057.JPG
2015-8-21
Use props
spheasant1
Second Officer
Flight distance : 3014675 ft
  • >>>
United States
Offline

greenbean Posted at 2015-8-22 00:55
work in progress...3/16 polyethylene sheet, acrylic piano hinge affixed with specific chemically bon ...

Great idea!  My biggest complaint of all the helipads is they aren't very 'portable'.  You were thinking along the same lines as me to use some type of hinged system.

Couple questions:
1) Where did you purchase the material?
2) Will the platform stay 'flat' when you open the hinge? ...what keeps the hinge from, well, 'hinging'? :-)
3) Do you need to use legs?   i have been using one of those 2x2 sections that are used for basement and garage flooring....the only reason I like a launch pad is so that i am launching and landing on a flat surface...I could see, however, if you are on a beach that you'd want some space up off the sand that is gonna blow all over the place.
2015-8-21
Use props
greenbean
lvl.3
Flight distance : 84783 ft
United States
Offline

rayrokni Posted at 2015-8-21 14:08
btw, just received my dji backpack, im glad i listened to you and bought that, lugging a suitcase  ...

should have bought it from amazon or ebay and saved $200…Monfronto 3N1-35 PL
2015-8-21
Use props
greenbean
lvl.3
Flight distance : 84783 ft
United States
Offline

spheasant1 Posted at 2015-8-22 01:09
Great idea!  My biggest complaint of all the helipads is they aren't very 'portable'.  You were th ...

Got the two 17 1/4 x 8 5/8 sheets and double faced tape from TAP Plastics and hinge on ebay. If you are extremely precise when adhering the hinge assuring the sheets are butted it will not fold past flat more than a couple degrees. I am not presently using legs but I was thinking maybe when on really uneven ground.

edit...when using the tape or any adhesive on polyethelyne you must prep the surface by heating to change its chemical structure...I used a torch..DO NOT OVER HEAT AND MELT

2015-8-21
Use props
spheasant1
Second Officer
Flight distance : 3014675 ft
  • >>>
United States
Offline

greenbean Posted at 2015-8-22 01:22
Got the two 17 1/4 x 8 5/8 sheets and double faced tape from TAP Plastics and hinge on ebay. If you ...

Much appreciated the details!
2015-8-21
Use props
febroker1
lvl.1

United States
Offline

That's sweet!
2015-8-21
Use props
bryvale
lvl.2
Flight distance : 475830 ft
United States
Offline

Very nice and the steps you laid out make it look really easy. But, what is the purpose of the additional holes?
2015-8-21
Use props
rayrokni
Second Officer
Flight distance : 8139875 ft
United States
Offline

bryvale Posted at 2015-8-22 07:20
Very nice and the steps you laid out make it look really easy. But, what is the purpose of the addit ...

So there is not as much resistance to the air displacement from props when landing, so the landing pad doesn't fly off!
2015-8-21
Use props
jayhkr
lvl.4

United States
Offline

rayrokni Posted at 2015-8-21 13:47
i am sadder, sitting in front of laptop at dark thirty yapping about nothing.

so the bolts should ...

Thought about using plastic version of the lag screws, so I might just do that.
2015-8-21
Use props
jayhkr
lvl.4

United States
Offline

Willie Wonka Posted at 2015-8-21 13:51
I would do a plastic version to avoid compass skew at take off, plus i would use that on top of my v ...

The screws CAN be adjusted for uneven ground, up to 6" in any direction!  That's why I have a nut on both sides, to lock it in place!
2015-8-21
Use props
jayhkr
lvl.4

United States
Offline

young.selina@ro Posted at 2015-8-21 18:47
Can you make it so you can adjust the legs for uneven ground?

Yes!  Loosen the nut on the side you want adjusted, screw the lag bolt to the desired position, and retighten the nut!
2015-8-21
Use props
jayhkr
lvl.4

United States
Offline

rayrokni Posted at 2015-8-22 07:34
So there is not as much resistance to the air displacement from props when landing, so the landing ...

Yep!, at least that was my thought process.
2015-8-21
Use props
rayrokni
Second Officer
Flight distance : 8139875 ft
United States
Offline

jayhkr Posted at 2015-8-22 13:03
Thought about using plastic version of the lag screws, so I might just do that.

you can also get plastic adjustable cabinet legs, wider, more stability and easy to adjust
2015-8-21
Use props
jayhkr
lvl.4

United States
Offline

I agree, I'll look into swapping mine out next week on my day off!  Found a set of 2 at Home Depot that will hopefully do the trick.  Thanks for the suggestion!
2015-8-22
Use props
bcristiano
lvl.1
Flight distance : 200023 ft
France
Offline

Excellent post jayhkr, this is exactly what I was looking for without even knowing it. An Helipad, so cool!
So did I, a bit of homework last saturday ;-)

Without painting:


Preparation for the painting:


Now, wait for the painting to dry...


Final, result is not so clean as expected, due to the kind of plexyglass I used (painting went a bit under the protective tape, my bad...)


Final:


Now I have to test it :-)

2015-8-23
Use props
jayhkr
lvl.4

United States
Offline

That looks great bcristiano! I have yet to try mine too, but this Wednesday I'll have that chance!  Might modify mine just a bit with plastic adjustable legs as suggested earlier if I get any issues from the compass, but I can't see that happening.  Great looking Heli-Pad!  You even got your "H" straighter than mine! LOL
2015-8-23
Use props
BrunoFR
lvl.1
Flight distance : 200023 ft
Offline

young.selina@ro Posted at 2015-8-24 16:31
Maybe he used a 'ruler'... is there no other way of affixing the screws without anything fouling t ...

One way to fix the screws without anything fouling the landing surface would be to drill a hole the size of the screws' head on top of the landing surface, on a depth of the screws' head height (beware of not going further that half the platform depth!).  
Doing so, you can "hide" the screws' head into the platform. This would work great with metal or wood, but with plexiglass this is another matter. Plexiglass is kind of difficult to work with and you can very wuickly mess with it. This can be achieved if you have a platform of at least 5mm imho.
PS: yes I used a 'ruler' ;-)
2015-8-24
Use props
rolyf
lvl.1

United States
Offline

Love these kinds of projects!  So on mine I'm adding 'runway lights' for those extended late evening flights.  Maybe an LED array along the four edges...yeah...and a homing beacon in case of fog...somebody stop me!!!

(Seriously, gotta make one because grass always gives me gimbal warnings.)
2015-8-24
Use props
BrunoFR
lvl.1
Flight distance : 200023 ft
France
Offline

young.selina@ro Posted at 2015-8-25 03:52
How about adding plexi-blocks underneath and screwing into these? Easy height adjustments can be m ...

Sounds a good idea! I'll give it a try. Still no chance to try my DIY helipad, rain & storms decided to take a one week vacation on my place :-(
PS : Thanks Selina ;-)
2015-8-24
Use props
Austringer
lvl.1
South Africa
Offline

My secretary and I went a bit overboard with the helipad design.Chip-board covered in vinyl and painted red and blue with acrylic: 20150828_140226_result.jpg 20150828_140215_result.jpg
Oversprayed with wood varnish. The cool thing are the cheap  plastic legs that can adjust their height and remove from sockets underneath board.

Good marketing for DJI.


2015-8-28
Use props
Phuglie
Second Officer
Flight distance : 45226 ft
United Kingdom
Offline

Austringer Posted at 2015-8-28 13:09
My secretary and I went a bit overboard with the helipad design.Chip-board covered in vinyl and pain ...

Nice colours - very pretty!
2015-9-11
Use props
Advanced
You need to log in before you can reply Login | Register now

Credit Rules