DJI Gamora
 Administrator
Online
|
Hi, lg_24. Thank you for reaching out. Please check the details below:
[Setting Path and Options]
1. Setting path: Tap the “...” icon at the lower left corner to go to General Settings, Screen Settings, and then Color Calibration.
2. Setting options:
• Color Calibration Mode: When this option is enabled, the original screen color calibration and stylized LUT are all disabled (at this moment, the screen color may change).
• Import Color Profile: To import the color calibration file.
• Reset Settings: To restore “Color Calibration” related options only.
[Screen Color Calibration Method]
1. Downloading the color calibration software:
• DisplayCAL (https://displaycal.net/);
• ArgyllCMS (http://www.argyllcms.com/):
2. Configuring the color calibration software:
• Launch DisplayCAL, click “File” in the top left corner, and click “Locate ArgyllCMS executables...”.
• The file directory window will be displayed. Please locate the directory where ArgyllCMS executables reside and click to select the folder.
• Click “Tools” in the top left corner and click “Install ArgyllCMS instrument drivers”, and the software will enumerate the display devices and communication interfaces.
3. Preparing for “Color Calibration”:
• Disable the “Center Maker” of the DJI High-Bright Remote Monitor.
* Path: Tap the “...” icon at the lower left corner to go to General Settings and then Screen Settings and disable Center Maker.
• Adjust the screen brightness to 100%.
* Path: Tap the “...” icon at the lower left corner to go to General Settings and then Screen Settings and adjust the brightness.
• Enable “Color Calibration Mode” on DJI High-Bright Remote Monitor.
* Path: Tap the “...” icon at the lower left corner to go to General Settings, Screen Settings, and then Color Calibration and enable Color Calibration Mode.
• Set your computer’s projection mode to Extended.
4. Starting “Color Calibration”:
* Datacolor’s SpyderX color calibration instrument is used in the tutorial.
• Select “sRGB” in the above “Settings” box and then click “Refresh” below.
• After the instrument is recognized, select “HBR-MONITOR” for the monitor, “Generic” for the measurement mode, and check “Black level drift compensation”.
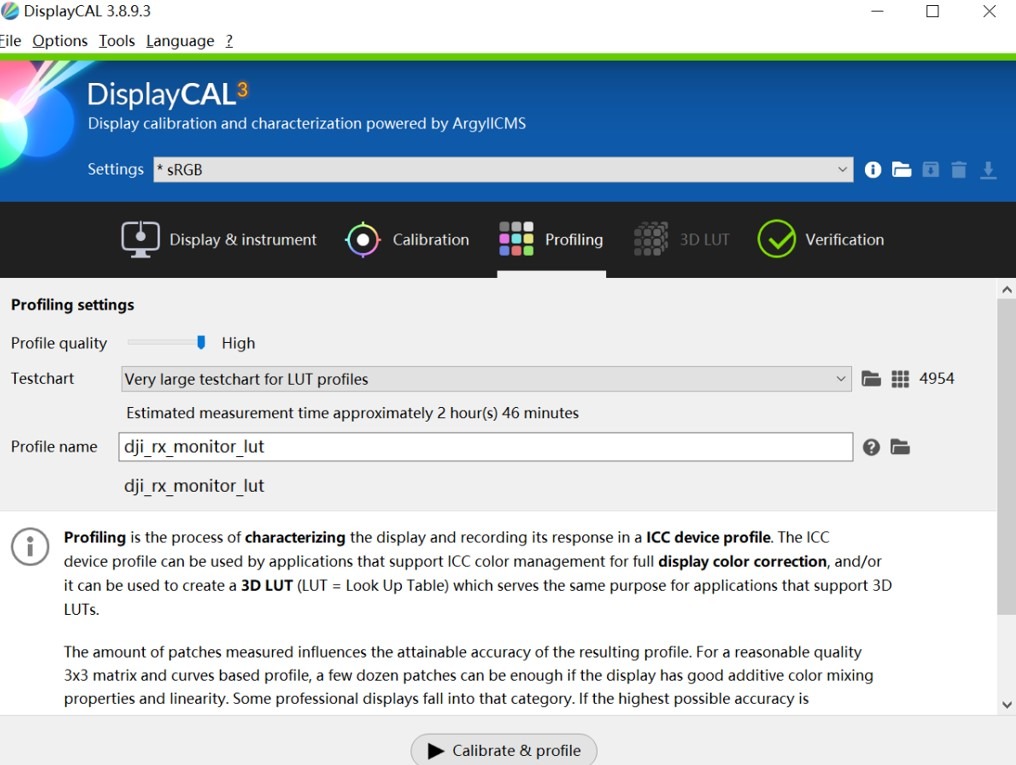
• Adjust “Calibration Settings” and “Profiling Settings” as shown in the figures below:
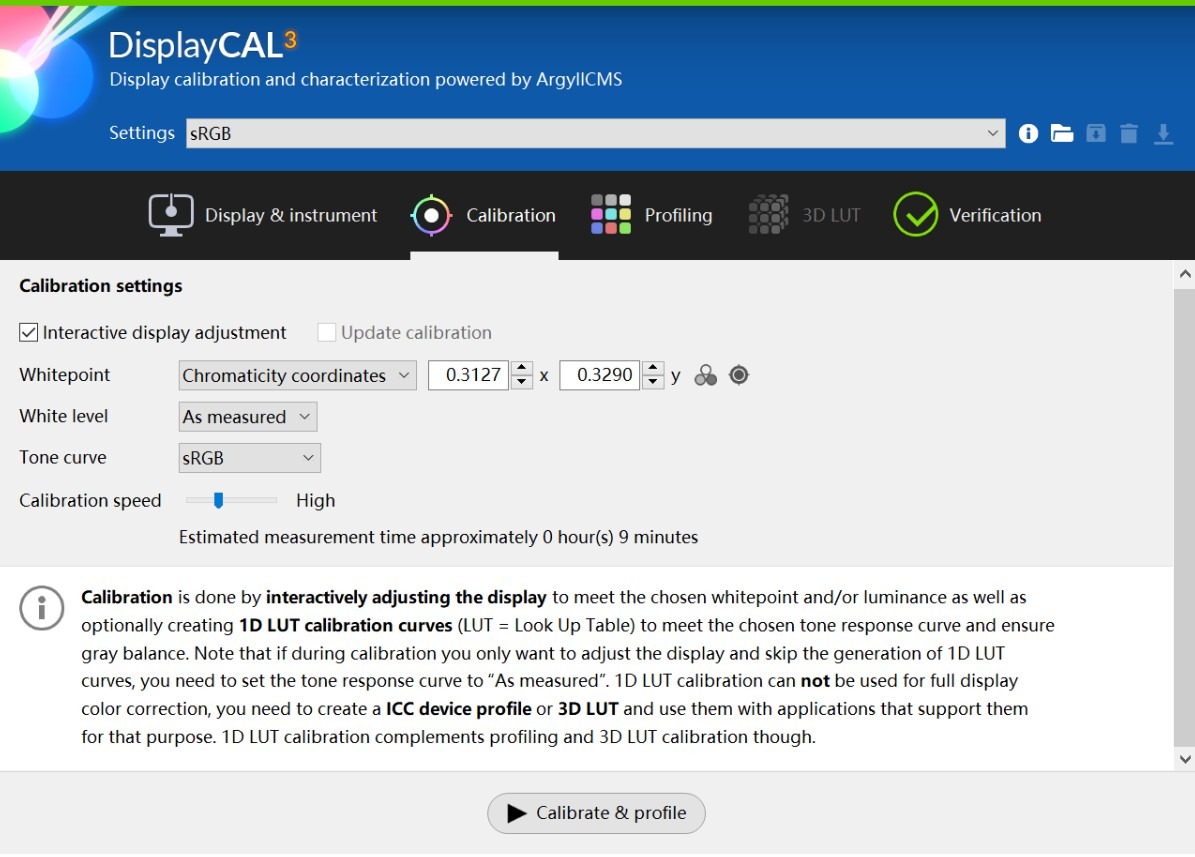
• Check the “Enable 3D LUT tab” in the “Options” drop-down menu.
• After completing the above profiling, click “Calibrate & profile”, set it to full screen, and click “Start measurement”.
• Calibrate the instrument according to the prompt. Click “OK”
• Complete “Measurement” and “Calibration”:
(1) After the instrument is calibrated, place the instrument on the screen center of the receiver monitor and click “OK”.
(2) After the calibration test is completed, click “Start measurement”.
(3) Click “Start measurement”, and at this moment, color temperature and RGB gain cannot be adjusted. Therefore, click “Stop measurement” and then click “Continue on to calibration”.
8) After the calibration is completed, click “Save 3D LUT as...” to save the CUBE file under the root directory in the microSD card of the DJI High-Bright Remote Monitor.
5. Importing “Color Profile”
• Go to the “Import Color Profile” interface on DJI High-Bright Remote Monitor.
* Path: Tap the “...” icon at the lower left corner to go to General Settings, Screen Settings, and then Color Calibration and enable Color Calibration Mode.
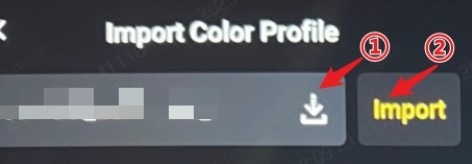
• Find the corresponding “Color Profile” and tap the "Import" icon (①) on the right side of the screen, and the lettering reading “Import” will pop up. Tap “Import” to complete “Color Calibration” (②).
 |
|


